Blog
5 Crucial Truths About Grouting & Sealing Tiles: Proven Tips, Pitfalls, and What Actually Works
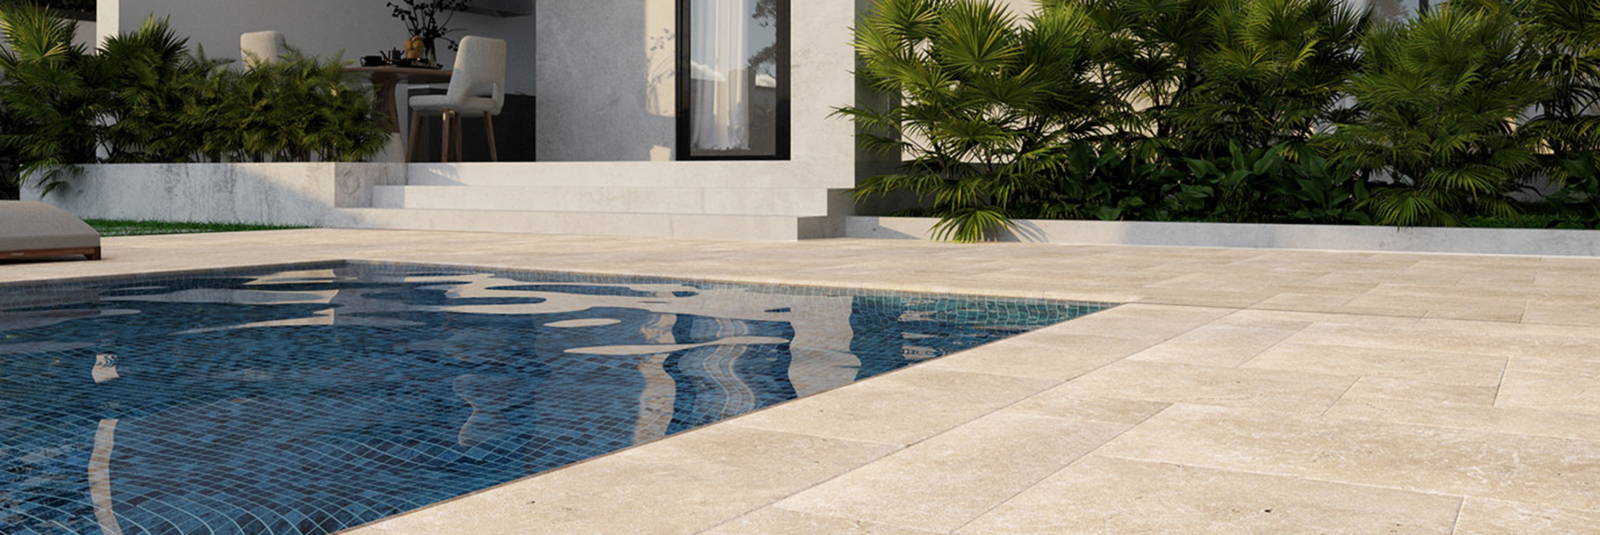
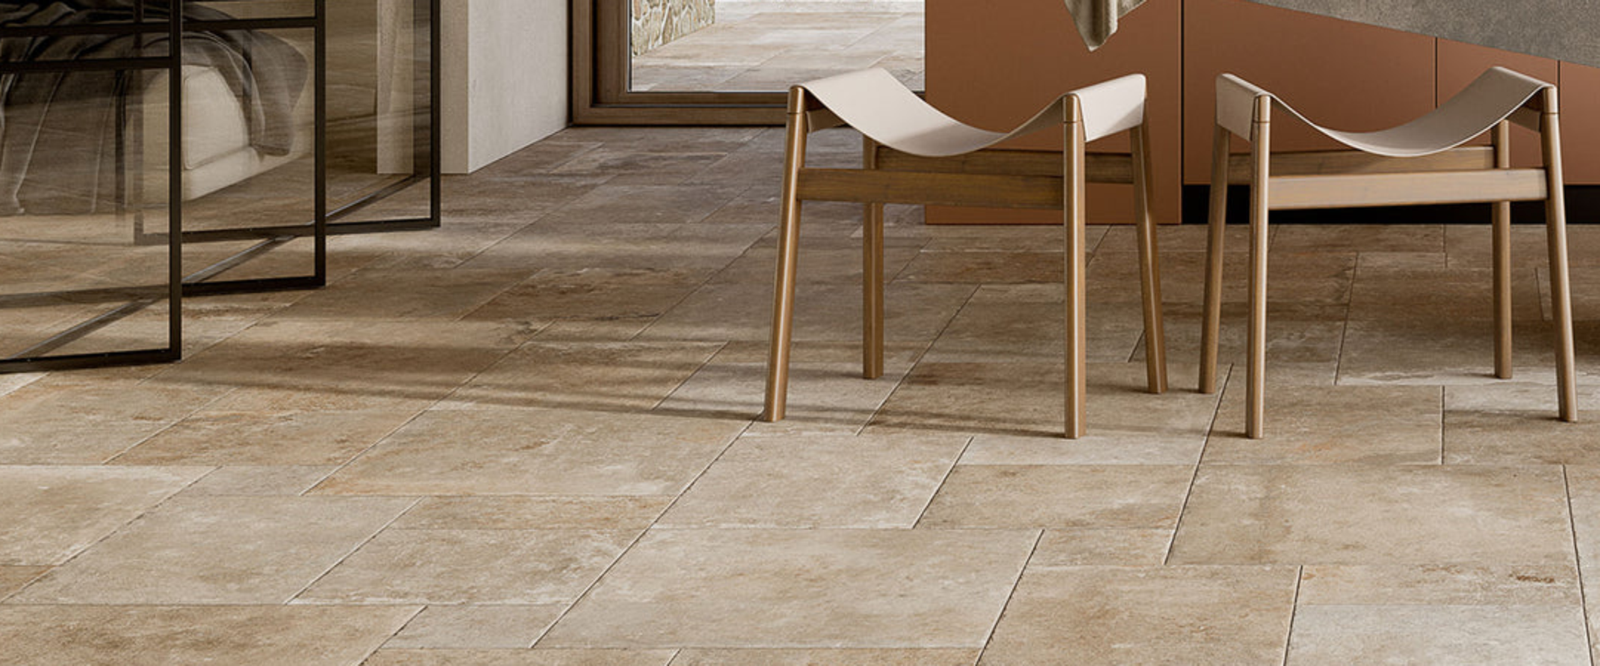
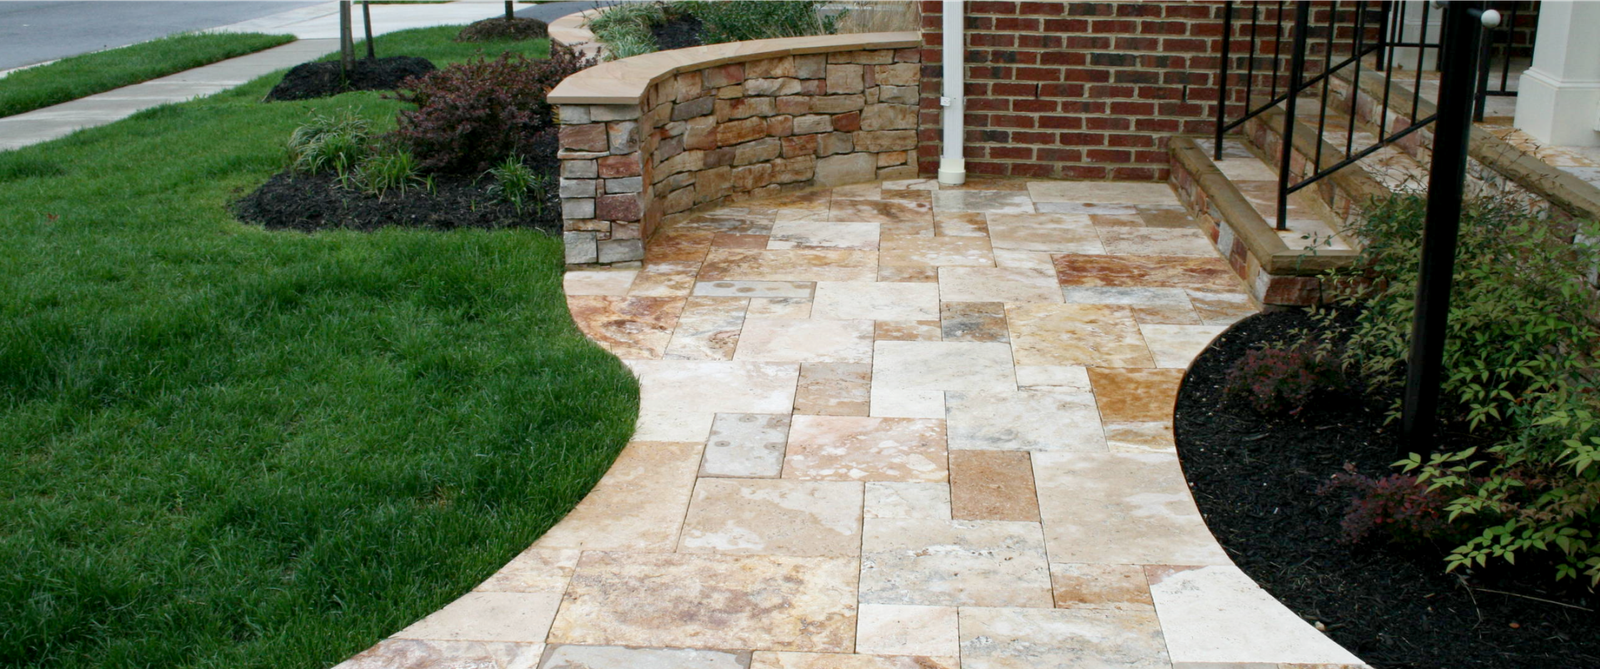
If you’re searching for flooring that combines beauty, durability, and timeless elegance, travertine tiles are likely to show up at the top of your list. With their earthy tones, distinctive textures, and organic patterns, they offer a refined and luxurious aesthetic that complements both indoor and outdoor spaces. Whether you’re designing a grand entryway, a serene bathroom, or a sophisticated patio and pool area, travertine delivers a timeless look that blends seamlessly with various architectural styles.
However, the beauty and longevity of natural stone don’t depend solely on the tile itself. What truly determines your floor’s performance and lifespan is how well you handle the grouting & sealing tiles process. These crucial finishing steps are often underestimated, yet they make all the difference between a flawless, long-lasting installation and one that quickly develops issues.
Without proper grouting, tiles can become loose over time, allowing moisture to seep into the subfloor, leading to cracks, mold, and even structural instability. Sealing, on the other hand, protects porous surfaces like travertine from absorbing stains, water, and harsh cleaning agents. Neglecting to seal correctly — or skipping it altogether — can result in permanent discoloration or damage that’s expensive to repair.
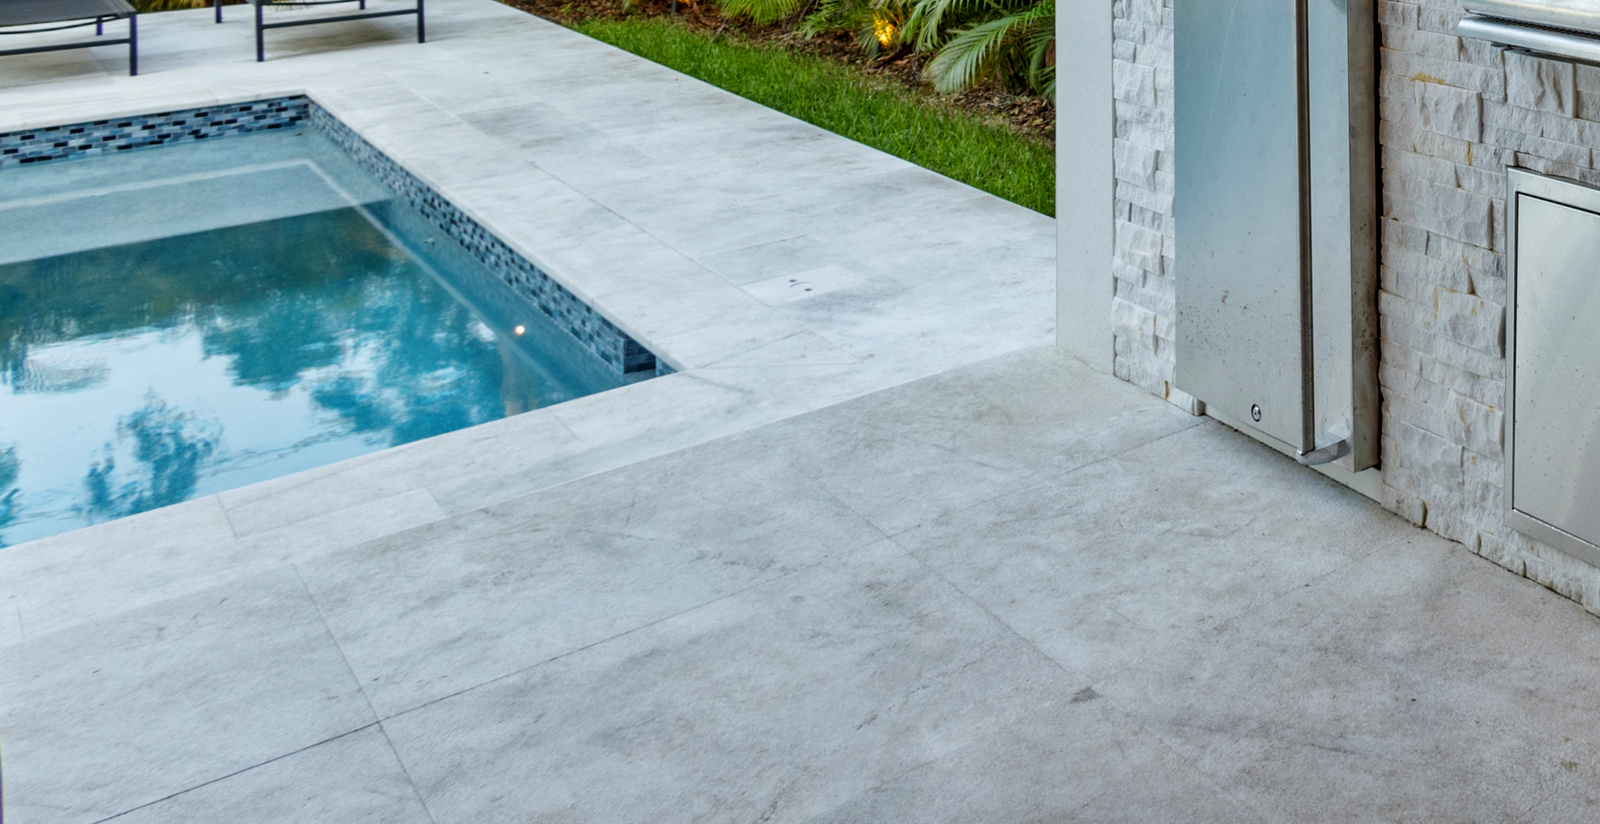
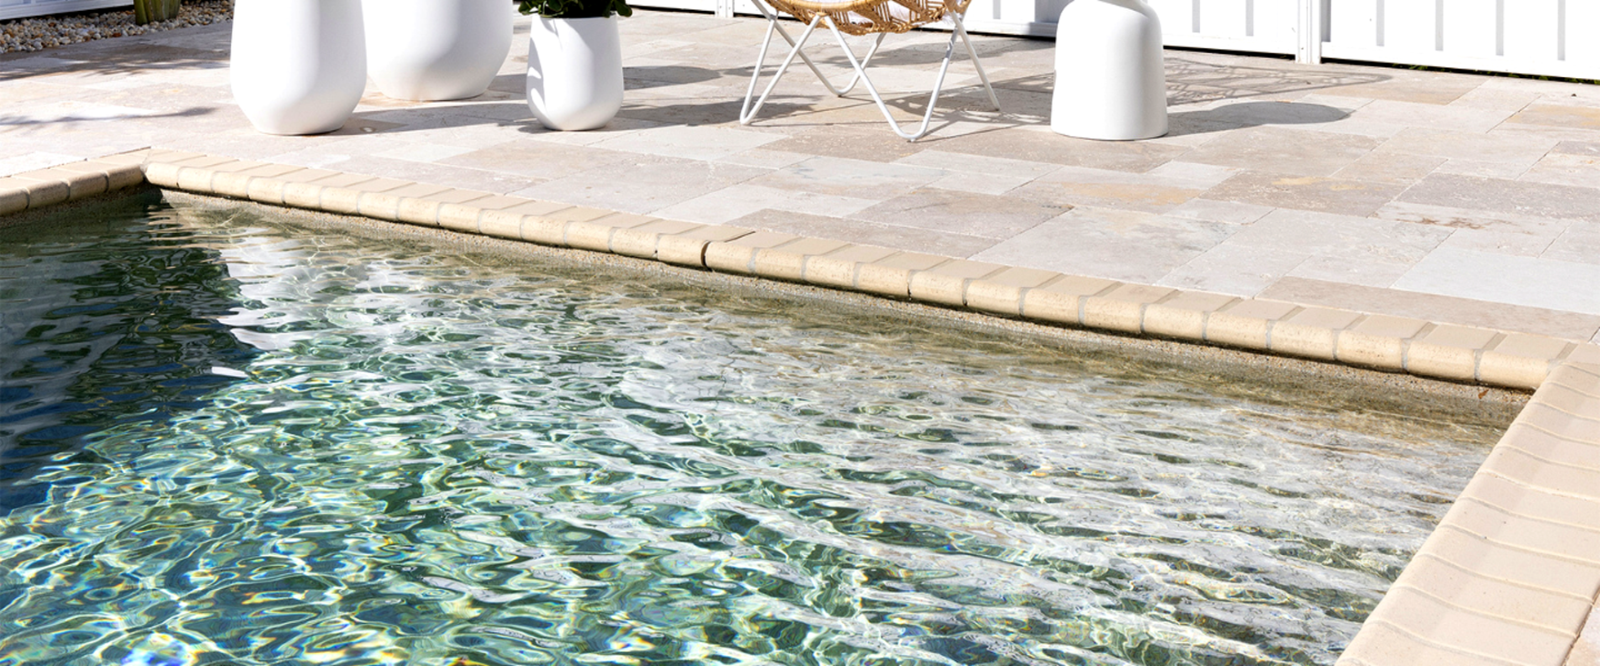
This is especially important in high-moisture areas like kitchens, bathrooms, and around pools, where the stakes are even higher. In these zones, grouting & sealing tiles correctly becomes not just a maintenance step, but a structural necessity. Pool coping, in particular, is extremely vulnerable to shifting, erosion, and chemical exposure if not treated properly. Many homeowners and even contractors make the mistake of thinking that once the tiles are set, the job is done — but the truth is, the job is only half finished. Choosing the right type of grout, applying it with the proper technique, and selecting the correct sealant based on the location and tile finish are all vital to the long-term success of your installation.
In the following sections, we’ll walk you through the 5 most important things you need to know about grouting & sealing tiles , especially when working with premium natural stone like travertine. These insights will help you avoid common pitfalls, make smarter product choices, and ensure a result that’s not only visually stunning but also built to endure.
Whether you’re a homeowner doing a renovation, a builder working on luxury finishes, or a designer specifying materials for a high-end project, understanding how to approach grouting & sealing tiles is key to delivering excellence. Don’t let a lack of preparation or improper technique compromise your investment — knowledge is the first step toward beautiful, long-lasting tilework.
Table of Contents
1. A Clean Surface Is Non-Negotiable
Before you even think about laying down tiles, surface preparation must be your absolute top priority, especially when it comes to grouting and sealing tiles. Proper surface prep is the foundation for a successful tile installation and sets the stage for flawless grouting and sealing tiles that will stand the test of time. Make sure the entire work area is completely clean — this includes removing all dirt, dust, adhesive residue, paint, and any debris from both the tiles and the substrate. Even the smallest leftover material can interfere with proper bonding, which can result in uneven tiles, weak adhesion, or long-term structural problems that will undermine your grouting and sealing tiles efforts.
If you’re working with surfaces that have been previously painted, varnished, or have a glossy finish, it’s absolutely essential to roughen them up using coarse sandpaper. This step is often overlooked but is critical for ensuring the adhesive bonds firmly and consistently to the substrate. Without this key surface prep, the adhesive can fail prematurely, particularly in high-moisture or high-traffic areas, leading to tile shifting or loosening after installation — issues that can complicate grouting and sealing tiles and reduce the lifespan of your project.
Equally important to surface cleanliness and texture is moisture control. Before starting your tile installation, always ensure both the tiles and the underlying surface are completely dry. Trapped moisture weakens adhesive bonds and can promote mold growth, which not only damages the substrate but also jeopardizes the effectiveness of your grouting and sealing tiles. Moisture-related problems are one of the main reasons tile installations fail prematurely, so taking this step seriously is crucial.
Thorough surface preparation may seem like a minor detail, but it is actually one of the most critical stages in the entire process of grouting and sealing tiles. Investing time and effort in proper prep work not only improves the immediate appearance of your tiled surface but also dramatically increases the durability and longevity of your installation. This careful approach to grouting and sealing tiles helps you avoid costly repairs, reinstallation, and material waste down the line, ensuring your tile surfaces remain beautiful and intact for years to come.
In summary, mastering the fundamentals of surface preparation is indispensable for anyone aiming for professional-quality results in grouting and sealing tiles. From cleanliness and substrate texture to moisture control, every detail impacts the success of your project. Remember, the better your surface prep, the stronger your tile bond, and the more flawless your grouting and sealing tiles will be.
2. Pre-Lay Your Tiles to Perfect the Pattern
Before you even think about laying down a single tile, one crucial step can make or break the entire project: surface preparation. This often-overlooked phase is the foundation of any successful tile job, and skipping it can lead to a wide range of issues — from poor adhesion to cracked grout lines or shifting tiles over time.
Start by ensuring that the entire work area is immaculately clean . That means removing all traces of dust, dirt, construction debris, old adhesive residue, paint splatters, and anything else that may have accumulated on the substrate or the back of the tiles themselves. Even the smallest particles left behind can interfere with proper bonding, causing the adhesive to fail prematurely or preventing tiles from sitting flush. A vacuum, a damp cloth, or a shop vac can be helpful tools in this phase, depending on the surface material.
Next, inspect the substrate carefully. If the surface has been previously painted, varnished, or sealed , you’ll need to break that finish by using coarse sandpaper or a sanding block. Glossy surfaces prevent adhesives from bonding effectively, so roughening the area creates the necessary texture to allow the thin-set mortar or mastic to grab and hold. In some cases — particularly in older homes — you may also need to remove layers of wax, polish, or old sealers that were never meant to serve as a base for tile.
It’s also important to check for structural soundness. The substrate should be firm, stable, and level. Any cracks, holes, or dips should be filled or repaired before proceeding. An uneven surface will not only make tile alignment more difficult but can also result in hollow spots that compromise the strength of the installation.
Moisture control is another often underestimated factor. Always ensure that both the tiles and the surface beneath them are completely dry before applying adhesive. Any trapped moisture can weaken the bond, cause tiles to shift or lift after installation, and even lead to mold or mildew growth underneath. This is especially important when working in areas prone to humidity, such as bathrooms, kitchens, basements, or outdoor patios.
In short, taking the time to properly prepare your surface isn’t just a best practice — it’s a necessity. Whether you’re working with porcelain, ceramic, or natural stone like travertine, proper surface prep ensures your adhesive performs as intended and that your tiles stay firmly in place for years to come. It’s also the first step toward successful grouting & sealing tiles, which depends heavily on how well your initial installation holds up.
Rushing into the installation without this foundational step can cost you much more in the long run — in repairs, rework, and material waste. But with just a bit of extra care and attention upfront, you’ll be setting yourself up for a smooth, long-lasting finish that not only looks professional but performs like it, too.
3. Use White Thin set for Lighter Travertine
Here’s a detail many installers — even experienced ones — often overlook: the color of the thinset you’re using. While it might seem like a minor choice compared to tile layout or grout selection, thinset color becomes critically important when working with porous natural stone like travertine.
Travertine tiles and pool coping are known for their light, earthy tones — ivory, cream, beige, walnut, and similar soft hues. These stones often contain natural voids and micro-pores that can easily absorb color from anything they come into contact with, including the adhesive beneath them. If you use a gray or dark-colored thinset, you run the risk of that pigment bleeding into the stone, especially if the tiles haven’t been sealed prior to installation. The result? Unwanted blotches or a dull, muddied appearance on what should be a clean, elegant surface.
To prevent this, white thinset is the recommended choice for light-colored travertine. It offers a clean, neutral backdrop that won’t interfere with the stone’s natural tones, helping maintain the integrity of your design. This is particularly important for high-visibility areas like bathroom walls, kitchen backsplashes, or pool surrounds, where even slight discoloration can stand out.
Once you’ve selected the right type, the consistency of your thinset mix is just as important as its color. For best results, mix the white thinset to a smooth, peanut butter–like consistency — not too stiff, not too runny. This ensures excellent spreadability and allows for full, even contact between the tile and substrate. A properly mixed thinset fills voids and eliminates air pockets, reducing the risk of hollow tiles, weak bonding, or tile movement over time.
Improperly mixed or applied thinset can cause more than just cosmetic issues. It can lead to lifting, cracking, or complete failure of the installation — which is especially costly and difficult to repair when working with natural stone. Remember, a strong bond is essential not just for durability, but for the success of later steps like grouting & sealing tiles.
In summary, don’t underestimate the impact of something as “simple” as adhesive color. Choosing the right thinset and applying it correctly helps protect your travertine investment, preserves the beauty of your stone, and ensures a long-lasting, professional-quality installation.
4. Grout Spacing Can Make or Break the Finish
When it comes to installing travertine tiles or pool coping, maintaining proper grout spacing isn’t just about appearance — it plays a critical role in both the structural performance and long-term stability of your surface. Grout lines absorb movement, allow for expansion, and help prevent cracking, shifting, or water intrusion — all of which are especially important when working with natural stone in high-traffic or moisture-prone areas.
For most travertine installations, the recommended grout joint falls between 1/4″ and 3/8″, depending on the tile size and finish. Larger tiles or irregularly cut pieces — especially those used in French patterns or rustic installations — often benefit from slightly wider joints to accommodate subtle size variations and ensure consistent alignment. On the other hand, more refined formats like honed or polished travertine may lend themselves to tighter joints or even butt-joint layouts (with very minimal spacing). While these tighter gaps can produce a more seamless look, they also require precision cutting and leveling, leaving little margin for error.
That’s why it’s always a smart move to consult with your travertine supplier or manufacturer before deciding on spacing. Different stones, finishes, and cuts can have specific recommendations for ideal grout width, especially when installing coping around pools, curved edges, or elevation changes. Local building codes or regional climate considerations can also influence optimal spacing — for example, outdoor installations in freeze-thaw climates often benefit from wider joints to accommodate temperature fluctuations and stone movement.
To achieve even, consistent lines across your layout, tile spacers are a must. They help ensure that your grout joints remain uniform — which is especially important across larger surfaces, intricate patterns, or when mixing tile sizes. Consistency in spacing not only improves the final visual appeal but also simplifies the grouting & sealing process later on.
Another factor to consider is grout flexibility. Natural stone expands and contracts slightly over time due to changes in humidity, temperature, and subfloor movement. The right spacing allows your grout to flex with the stone, reducing the risk of cracking or joint failure. Skimping on space may save grout, but it often leads to long-term problems that are costly to fix.
In the end, choosing the correct grout spacing is a balance between aesthetics, functionality, and the specific demands of your material. Done properly, it not only elevates the finished look of your travertine installation but also ensures a more resilient, longer-lasting surface — especially when paired with proper grouting & sealing techniques.
5. Seal Smart — Not Just Once
One of the most debated topics in tile installation — especially when working with natural stone like travertine — is when to apply sealer. Should it be done before the tiles are installed? Before grouting? Or after the entire installation is complete? The short answer: it depends on your specific materials and project conditions. But one thing is certain — sealing is never optional.
Travertine and other porous natural stones are especially vulnerable to moisture absorption, staining, and discoloration. That’s where a high-quality natural stone sealer comes in. When applied correctly, it penetrates the surface to create an invisible barrier that helps block liquids, oils, and dirt from seeping into the pores — while still allowing the stone to breathe. This added layer of protection can significantly extend the lifespan of your tiles, preserve their natural color variations, and make ongoing maintenance far easier.
Now, let’s talk timing.
If you’re working with unsealed travertine, many professionals recommend pre-sealing before installation — especially when tiles will be handled frequently or installed in messy environments. Pre-sealing can prevent adhesive or grout pigments from penetrating the surface during installation. This is particularly important for light-colored stones like ivory or cream, which can easily stain from dark grouts or thinsets if left unprotected.
Some installers prefer to wait until after the tiles are set but before grouting. This method still offers protection from grout haze or pigment absorption, without risking the sealer interfering with the tile bond. Be careful, though — applying sealer too early in the setting process can prevent adhesives or grout from bonding properly if not done with the correct timing and products.
Finally, if you didn’t pre-seal, it’s absolutely essential to seal the surface after grouting — once everything is clean, dry, and fully cured. This final sealing step locks in protection across both the tiles and the grout lines, shielding them from moisture intrusion, UV damage, and surface wear over time. For travertine pool coping or exterior installations, using a sealer with UV resistance and weatherproofing properties is especially important.
In all cases, be sure to use a natural stone sealer that’s appropriate for your specific travertine finish — whether honed, tumbled, brushed, or polished. Some sealers enhance the color and give the surface a wet look, while others maintain a matte, natural appearance. Always follow the manufacturer’s instructions for application, drying time, and reapplication intervals.
In short, sealing isn’t just a finishing touch — it’s a critical part of the grouting & sealing process that determines how well your tile performs in the long run. Skipping this step (or doing it improperly) can lead to permanent staining, premature wear, and costly maintenance. But when done right, sealing protects your investment and keeps your travertine looking beautiful for years to come.
Final Thoughts about Grouting & Sealing Tiles: It’s All in the Details
Travertine tiles and coping are undeniably luxurious, durable, and timeless materials — prized for their natural beauty and lasting appeal. However, the longevity and elegance of these surfaces depend entirely on how carefully and precisely they’re installed. Paying close attention to every stage of the process, especially grouting and sealing tiles, is absolutely essential to avoid common problems such as grout cracking, surface discoloration, premature wear, or even tile loosening over time.
Proper grouting and sealing tiles is not just a finishing touch; it’s a critical step that protects your investment by reinforcing the stability of the installation and preserving the natural beauty of your travertine. From thoroughly cleaning and preparing the substrate to selecting the right thinset color, maintaining consistent grout spacing, and choosing a high-quality sealer specifically formulated for your travertine finish, each step in the grouting and sealing tiles process plays a vital role in the longevity and appearance of your floors and pool surrounds.
Neglecting any of these key steps in grouting and sealing tiles can compromise both the aesthetic appeal and structural integrity of your installation. Improper grout application or skipping the sealing phase can leave your travertine vulnerable to water damage, staining, and even deterioration due to exposure to UV rays and environmental elements.
Whether you’re working with a professional contractor or handling the project yourself, it’s crucial to dedicate ample time for thorough planning, meticulous surface preparation, careful installation, and protective finishing. Travertine is a significant investment — both financially and stylistically — and it deserves precise handling to preserve its natural elegance, strength, and durability over the years.
By following best practices in grouting and sealing tiles, you’ll ensure that your travertine surfaces remain stunning, resilient, and long-lasting. Proper attention to these details enhances your home’s beauty and value, providing a sophisticated finish that withstands the test of time.
Contact us today and let us help you make that vision come true at (813) 885-6900 or email us at info@stone-mart.com for more information.
Or drop by our showroom to see our stunning collection: Tampa, FL, St Petersburg, FL, Orlando, FL, Naples, FL, Sarasota, FL, Fort Myers, FL, Jacksonville, FL, Houston, TX and Savannah, GA